Vanilla Buttercream

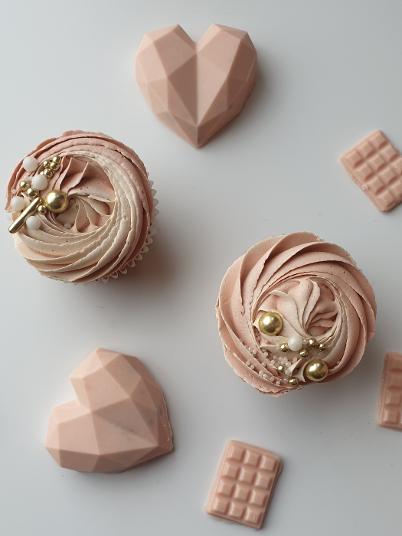
My recipe for Vanilla Buttercream is honestly going to be the best you've ever tried!  This recipe will guarantee that your buttercream turns out creamy, light, and fluffy every single time! 

Weather you are whipping up buttercream for some sweet cupcakes, or you need the perfect recipe to cover a small layeredcake, this is the only buttercream recipe you will ever need.

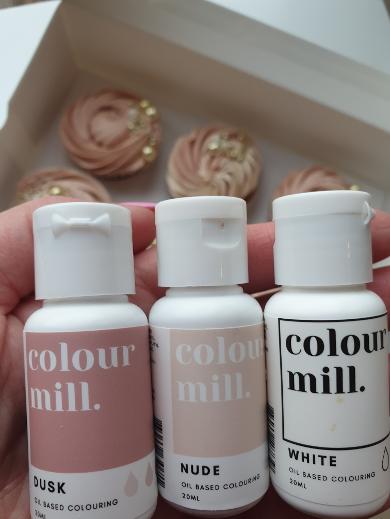
You can change up the flavour every time to what ever you fancy. This seriously is the buttercream that just keeps on giving!

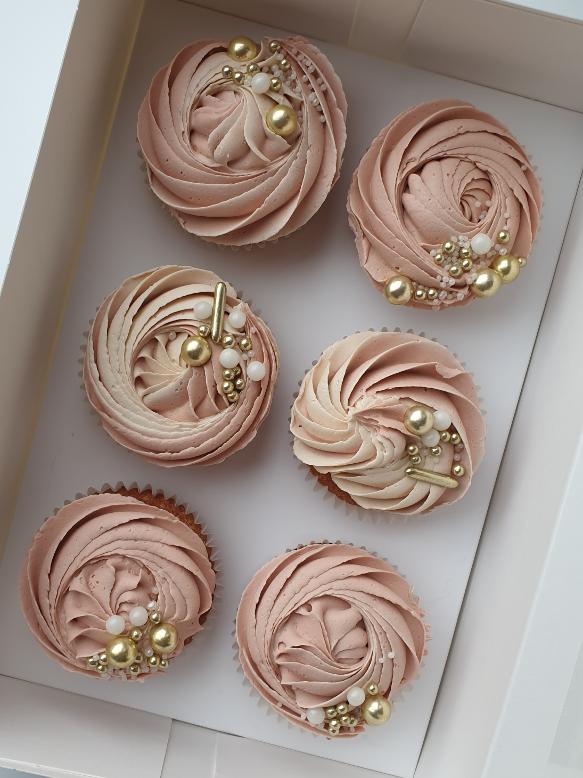
My fab recipe makes enough to decorate 12 cupcakes :)

What you will need ~

  • Weighing scales
  • Electric / Handheld mixer
  • A Large Bowl if using a hand mixer
  • Spatula
  • 1 Tablespoon
  • 1 Teaspoon
  • 2 small bowls
  • A Pint Glass
  • Piping bag
  • Piping nozzle ( I used the Wilton 857 tip to make pretty rosettes)
  • Sprinkles & Sugar Rods for decoration
  • Food colouring (Colour Mill Dusk, Nude, and white shades ~ as per pictures shown)

***This is not affiliated marketing with Wilton, or Colour Mill, just my preference for when it comes to making pretty cupcakes :)

Ingredients ~

  • 340 gm Icing Sugar
  • 150 gm of Soft Butter 
  • 3-4 Tbsp. of whole milk
  • 1 Tsp of Vanilla Extract 

Method ~

  • Weigh out all of your ingredients
  • Using your electric mixer, cream your butter until it is nice and fluffy.
  • Add in half of the icing sugar and whisk again on a medium speed for 5 minutes or so.
  • Add in the remaining icing sugar and whisk until it has fully  combined together.
  • Pour in your milk and your vanilla extract and mix again on high for a further 5 minutes.
  • The buttercream will be lovely and light at this stage.
  • Add in a few drops of white food colouring. This will help to remove any unwanted yellow tint from the buttercream, and make it nice and bright.
  • Separate the buttercream into 2 small bowls. ( I do this to add multiple shades/ or an Ombre effect to my cupcakes, but you can just use 1 colour if you wish)
  • In one bowl, add in a few drops of Dusk and whisk until it is combined in full. For a darker shade, proceed to add in more drops of colour at a time, and mix until you get the preferred shade.
  • In the other bowl, add in a few drops of the Nude shade and whisk as above and until you reach the preferred shade of nude.
  • Pop your piping nozzle into the end of the piping bag and cut at the bottom. Just trim enough of the tip of the bag so that the tip of the nozzle is showing.
  • Place the piping bag into the pint glass and fold down the side of the bag along the outside of the glass ~This makes it a lot easier to fill the piping bag without causing a mess!
  • Using your spatula, scoop the dusk coloured buttercream and put it in the piping bag to one side. Spread evenly up the bag
  • Repeat this with the nude colour and spread it along the opposite side of the bag (if you are doing multiple shades).
  • Shake the bag slightly so that the buttercream drops to the bottom near the nozzle.
  • Using your other hand,  gently close the top of the bag and twist the bag tightly in clockwise motion to remove any unnecessary air bubbles.
  • The buttercream will start to appear at the tip of the nozzle.
  • Using both hands (One finger guiding the nozzle and your other hand holding the bag, gently squeeze the bag and pipe in circular motions on top of the cupcake for pretty Ombre swirls.
  • Repeat this process until all of the 12 cupcakes are frosted.
  • Add your sprinkles and sugar rods to complete the look!

Wow, aren't they pretty? 


© Copyright The Happy Spatula .ie